
Intake Valve Repair Kits: What Is Inside, and When to Rebuild Instead of Replace
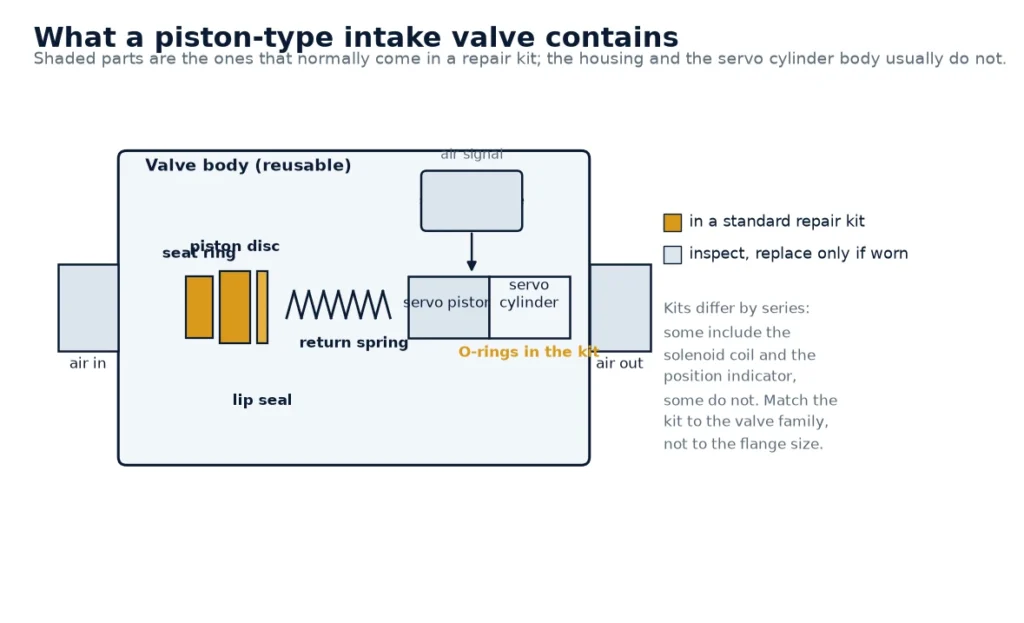
Short answer: an intake valve repair kit contains the parts that wear — seat ring, piston disc, lip seal or diaphragm, return spring, and the O-rings and gaskets that seal the servo cylinder. It does not contain the valve body, the servo cylinder body, or (in most kits) the solenoid coil. Whether a kit is enough comes down to five measurements on the parts you keep, not to how the valve looks from outside.
We get this question several times a month, usually in the same form: a photo of a valve, a model number, and the words complete repair kit. The honest answer is that “complete” means different things for different valve families, and the kit that fits an AIV-type piston valve is not the kit that fits a proportional valve from another series. This guide covers what is normally in a kit, how to confirm the match, the measurements that decide rebuild versus replace, and the assembly mistakes that shorten the life of a freshly rebuilt valve.
What is normally in a kit, and what is not
A repair kit is a wear-parts set. It is put together on the assumption that the castings and the machined bores are still good, which is true most of the time on a valve that has been in service for a few years and false on a valve that has been running with a torn seal for months.
| Part | Usually in the kit | Function | Wear signature |
|---|---|---|---|
| Seat ring | Yes | Gives the piston disc a flat face to close against | Groove, step or polished ring at the contact face |
| Piston disc | Yes | Moves to throttle or close the inlet | Warp, step at the seal groove, fretting on the stem |
| Lip seal / diaphragm | Yes | Seals the piston to the bore | Hardened, cracked, set flat, or torn at the lip |
| Return spring | Yes | Closes the valve when the signal drops | Free length below spec, uneven coils, broken end |
| O-rings, gaskets, seals | Yes | Seal the servo cylinder and the flanges | Flat section, cuts, hardened surface |
| Servo piston | Sometimes | Converts air signal into valve movement | Score marks, worn bore clearance |
| Solenoid valve / coil | Rarely | Switches the air signal | Open coil, stuck spool, swollen seal |
| Valve body, cylinder body | No | Structure and bore | Corrosion, cracks, bore out of tolerance |
That last row is the reason a kit sometimes does not solve the problem. If the bore is scored, a new lip seal will not seal against it, and the valve will be back to its old behaviour within weeks. Ask for a kit list before ordering, and compare it against the parts you actually suspect.
Kits are family-specific: confirm the match in three steps
Two valves can look identical from the outside and take different kits. The differences hide in the seal arrangement, the spring rate and the servo area. Confirm the match this way:
- Model, then series. A model number alone is sometimes not enough — valve families share a naming pattern and differ in the internal arrangement. Give the full designation as stamped on the valve body, plus the machine model it is fitted to.
- Photograph the bore side. With the valve open, a photo of the seat area and the piston face tells more than the outside of the housing. Include a scale or a rule in the frame.
- Confirm the function. An on/off valve, a proportional valve and a valve with an integrated position indicator take different kits even within one family. If the machine modulates the inlet rather than opening and closing it, say so — the kit probably includes a different spring and seal set.
If a supplier offers one kit for “all sizes”, that is a signal to look elsewhere. The seal and spring are sized for the valve, and a kit that fits a 40 mm valve will not fit a 120 mm valve regardless of what the flange pattern suggests.
The five measurements that decide rebuild or replace
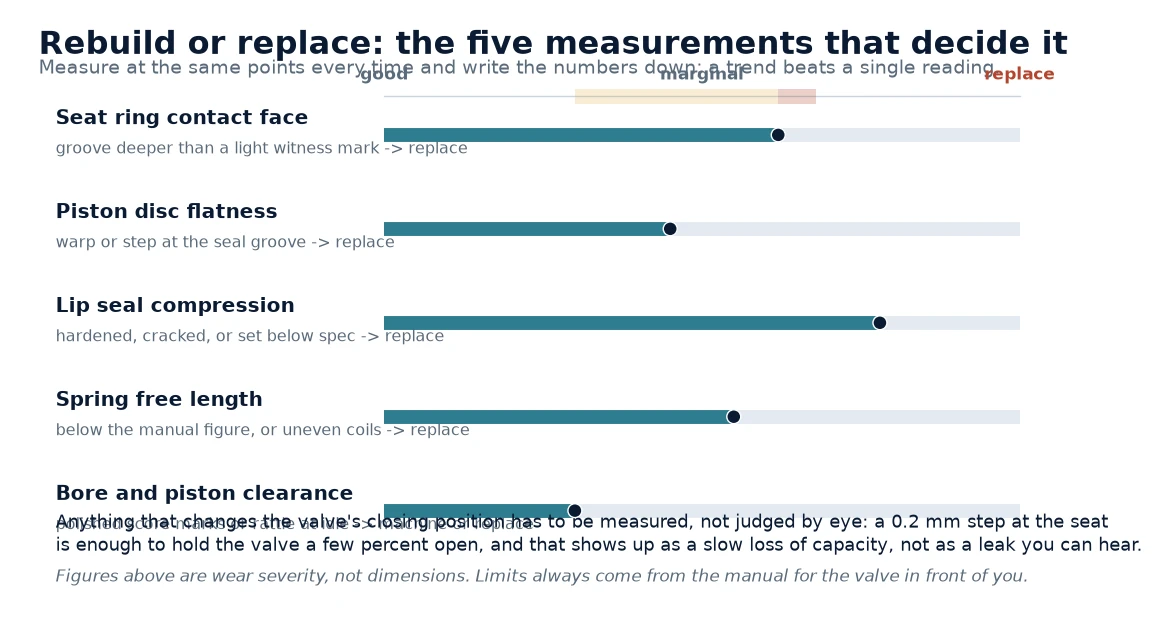
Measure the parts you are keeping, not the parts you are buying. These five cover almost every case.
| Measurement | Where | Rebuild is enough when | Replace the valve when |
|---|---|---|---|
| Seat ring contact face | Flatness and surface of the seat | Light witness mark only, no groove | Groove you can catch a fingernail in |
| Piston disc flatness | Across the disc and at the seal groove | Within the manual’s flatness figure | Visible warp or a step at the groove |
| Bore and piston clearance | Cylinder bore, at the seal land | Bore smooth, clearance within spec | Score marks, ovality, rattle at idle |
| Spring free length | Unloaded length, and coil evenness | At or above the manual figure | Below spec, or coils uneven |
| Housing and servo body | Corrosion, cracks, thread condition | Sound, threads clean | Cracked, corroded through, threads stripped |
A valve that fails the fourth column in any one row is a replacement, even if the rest measure well. The economics are simple: a rebuilt valve with a worn bore will not hold a stable pressure band, and an unstable band costs capacity on every cycle for as long as the valve stays in service. That is a much larger loss than the difference between a kit and a complete valve.
What the wear pattern tells you about the machine
The parts you take out are a report on how the machine has been running. Read them before you throw them away.
- Seal torn on one side only — the piston is not travelling square, usually a bent stem or a worn guide. A new seal will fail the same way.
- Seat ring polished but not grooved, disc clean — the valve has been cycling far more than its duty requires. Look at the load/unload cycle time and the receiver volume.
- Heavy carbon or oil sludge in the valve — oil carryover from a saturated separator, or oil that is past its life. Fix that first, or the new kit will be coated in the same deposit within a few months.
- Corrosion and rust staining — condensate reaching the intake. Check the dryer, the drain sequence and whether the machine sits idle for long periods with a wet sump.
- Spring broken at the end coil — usually fatigue from chatter. Chatter comes from an unstable air signal or from the valve sitting partly open at low demand.
This is the same reasoning as the sight glass, return check valve and minimum pressure valve trio: the small parts record the machine’s history, and replacing them without reading them means repeating the failure.
Rebuild sequence that avoids the usual mistakes
Half the rebuilds that fail early fail for assembly reasons, not part quality. The sequence below is deliberately conservative.
- Isolate and vent. Lock out, vent the receiver and the valve’s air signal line, and confirm zero pressure at the valve before opening it.
- Photograph before disassembly. Orientation of the spring, the seal lip direction and the servo port positions all matter and are easy to get wrong on reassembly.
- Clean, then inspect. Solvent, dry, then look at the bore under light. Do not lap or polish a bore unless the manual allows it.
- Fit the seal dry or lubricated, as specified. Some lip seals must go in dry; others need the oil the machine uses. Using grease on a seal that should be dry can hold the lip off its seat.
- Do not over-lap the seat. Lapping removes material and changes where the disc closes. A light lapping to restore flatness is normal; grinding a groove out is not.
- Check the spring against the manual, not against the old one. An old spring that has sagged will make a correct new spring look wrong.
- Torque in the specified order and to the specified figure. Uneven torque on a die-cast housing distorts the bore and creates the very leak you were repairing.
- Function test before the machine goes back to work. Apply signal air, watch the valve open and close fully and smoothly, and check for leakage at the closed position with a little soap solution.
Allow more time than the part swap suggests. The valve itself comes off in well under an hour on most packages; the cleaning, inspection and testing are what take the shift, and they are the steps that determine whether the rebuild lasts.
When rebuilding is the wrong call
Three situations where a kit is not the answer, even though it will physically fit:
- The valve is being asked to do a job it was not built for. An on/off valve on a machine that modulates its inlet will cycle itself to death. Rebuild it and it will fail again on the same schedule.
- The pressure band is unstable for another reason. If the machine hunts because the minimum pressure valve is soft, or because the controller’s PID is misconfigured, the intake valve gets blamed and rebuilt repeatedly.
- The valve is part of a matched set with the controller. Some variable-speed machines use a proportional valve whose signal and feedback come from the drive controller. Fitting a different valve family, even a good one, can leave the controller unable to hold a stable pressure.
If your machine is inverter-driven, read which parts are and are not interchangeable between variable-speed and fixed-speed machines before choosing a valve. And if the valve failed alongside high oil consumption, look at the separator element and filter intervals at the same time — oil reaching the valve is a symptom of a separator that has stopped doing its job.
Replacement procedure itself is covered in the intake valve replacement walkthrough, and the wider symptom map is in the screw compressor troubleshooting guide.
What to send when you ask for a kit
Four pieces of information remove almost all of the back-and-forth:
- the full valve designation as stamped on the body, plus the machine model and year;
- one photo of the valve in place, and one of the open bore and seat area;
- whether the valve opens and closes, or modulates with load;
- the symptom in one line — no capacity, unstable pressure, air leaking at shutdown, or a noise.
With those, a kit can be matched to the valve family rather than to the outside dimensions, which is the difference between a rebuild that lasts and one that comes back in three months.
Frequently asked questions
Does a repair kit include the solenoid valve?
Usually not. Most kits cover the mechanical wear parts: seat ring, piston disc, seal, spring and the O-rings that seal the servo cylinder. The solenoid coil or the solenoid valve itself is normally a separate item. If the valve is not responding to the signal at all, test the coil and the spool before ordering a mechanical kit.
Can I fit a kit for a smaller valve size to a larger valve?
No. Seals and springs are sized for the bore and the servo area of a specific valve. A kit is matched to a valve family and a size, not to the flange pattern. If a seller offers one kit across sizes, treat the listing as unreliable.
How do I know if my valve needs a kit or a whole new valve?
Measure the parts you are keeping: seat contact face, disc flatness, bore clearance, spring free length, and the condition of the housing and servo body. Any scored bore, cracked housing or stripped thread means a replacement. If all five measure within the manual’s figures, a kit is the correct repair.
Why did my rebuilt valve fail again after a few weeks?
The three common reasons are a bore that was already out of tolerance, a seal fitted with the wrong lubrication (or fitted dry when it should be lubricated), and an underlying cause that was never fixed, such as oil carryover from a saturated separator or an unstable air signal making the valve chatter.
Can I lap the seat ring to remove a groove?
Light lapping to restore flatness is normal practice. Grinding out a visible groove removes material and changes the closing position of the disc, which changes the valve’s flow behaviour and can leave it unable to shut fully. A grooved seat ring is a replaceable part for exactly this reason.
How long should a rebuilt intake valve last?
It depends far more on cycle count and oil condition than on the kit. A valve cycling continuously in a short-cycling system will wear out quickly no matter how well it was rebuilt; the same valve on a machine with adequate receiver volume and clean, dry oil will run for a long time. Fix the cycling and the oil before expecting a long life from the rebuild.
These answers cover the common cases. Machine-specific limits always come from the manual of the unit in front of you.
Match the kit to the valve family
Send the valve designation, the machine model and a photo of the open bore — we will confirm which kit fits before you order, and tell you if the valve is past rebuilding.